This example picks up where
Entering A Load left off so if you have not yet read the previous topic please read it first. We will add a second pickup and a second delivery to the load that was started in the previous topic.
Note: This is a single load (a single invoice billed to a single party) with multiple stops. This is not an LTL load. See LTL - SubPro Loads for details on that type of load.
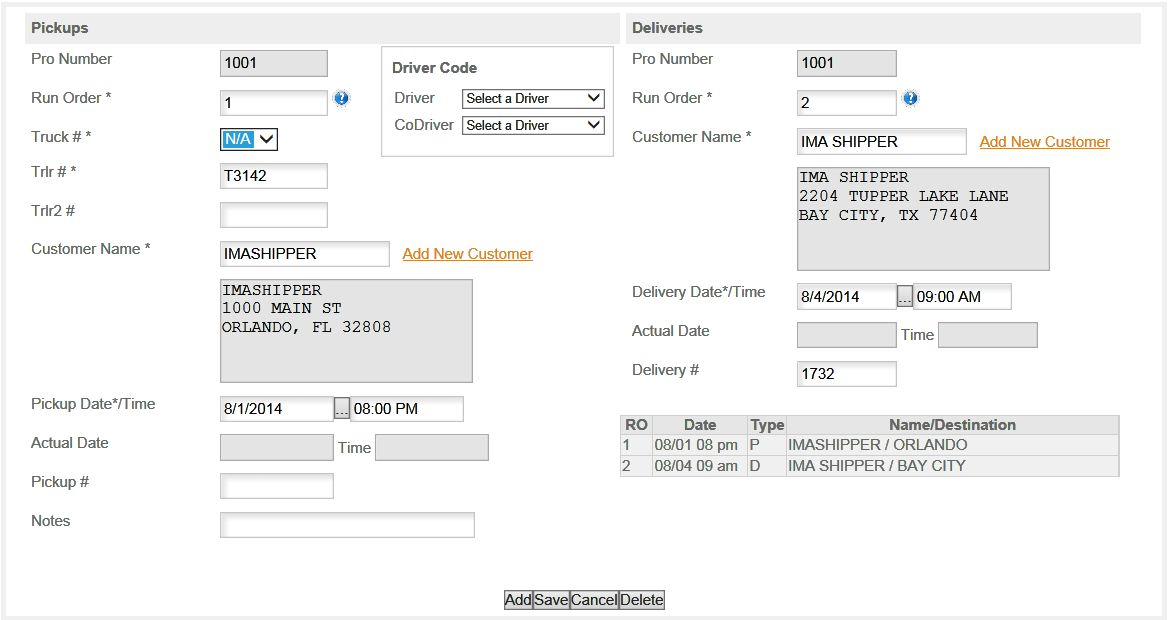
So the first step is to create the initial load. This will be the FIRST PICKUP and it's associated delivery.
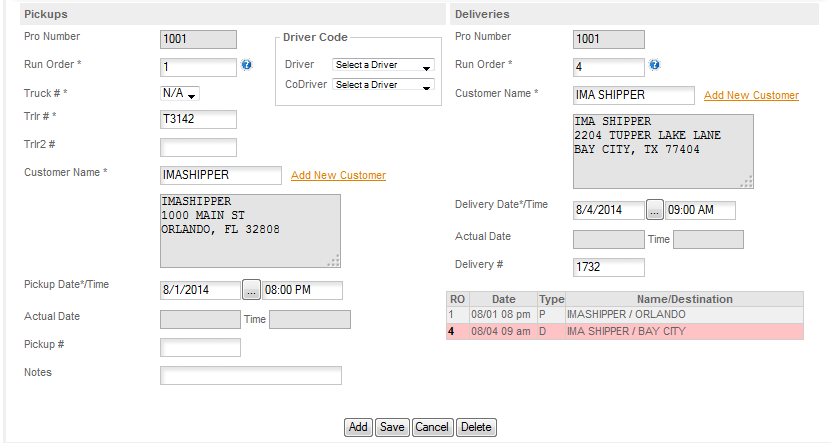
For our load and most loads, first in is generally last out, so we'll change the run order to 4 to indicate that this delivery will be the 4th stop on this load.
Note: RUN ORDER must always start with 1 for the first pickup and then end with the last delivery. There can be no gaps or missing numbers. You cannot change the Run Order for the first delivery until AFTER YOU SAVE THE TRIP! Click save to save the load, then change the delivery to 4 and Save again to save the change.
Changing the RUN ORDER to 4 creates a hole in the run order so our Summary Grid turns red to indicate that there is something wrong with the current run order scheme. It will turn red if things are listed out of order as well as when a run order is missing. As you are entering your stops the date/time for the run order you are entering will be checked against the remainder of the load. If an error is found you will get a DATE error. See below where we have intentionally created one for you.
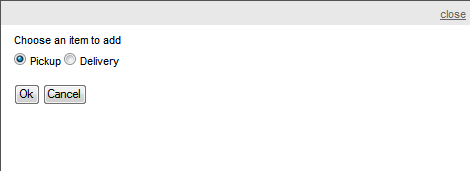
Next you'll click on the ADD button to add a new pickup - the Add box will appear and we'll check the Pickup to tell it what we want to add.
Check the option button for the Pickup or Delivery and then click OK. For our example we have selected to enter another Pickup -
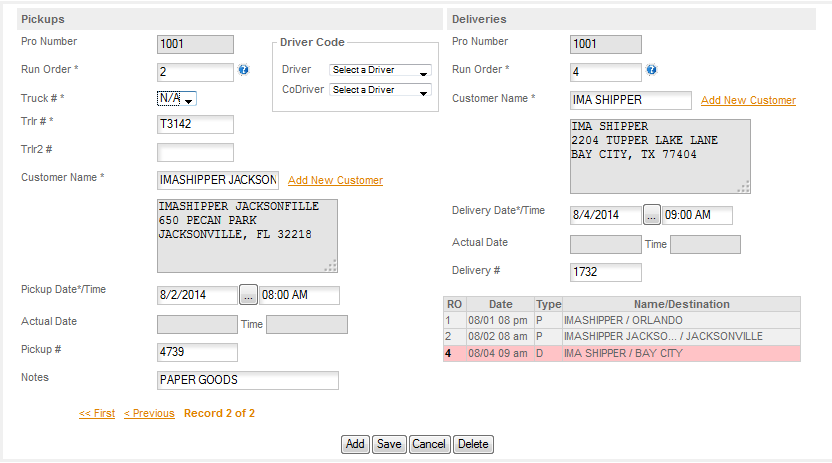
The rules for entry are the same as they were for the first record so we won't go over them again. Fill in the form and click SAVE. The program will automatically use the next available Run Order for whatever you add so just check to be sure it's right. The recap is still red as Run Order 3 is still unresolved. So next we'll add the delivery for the items we just picked up. For this delivery I purposely entered a bad date, that is a date which was after the last delivery. So SAVE give me a date error message -

You'll note that the message says "DATE ERROR! The delivery date is before the pickup date." These messages are not always accurate on exactly what the problem is, but the date error is critical for finding the error. In our example we only have this load entered, so the date to check is the current record against the next stop which is the final delivery which is on 8/4. I entered 8/8, obviously I cannot deliver Run Order 3 before Run Order 4. If you get a date/time error then just check the following dates & times to be sure that the one you are currently entering is before the following pickups and deliveries. Correct your bad date and then Save the record.
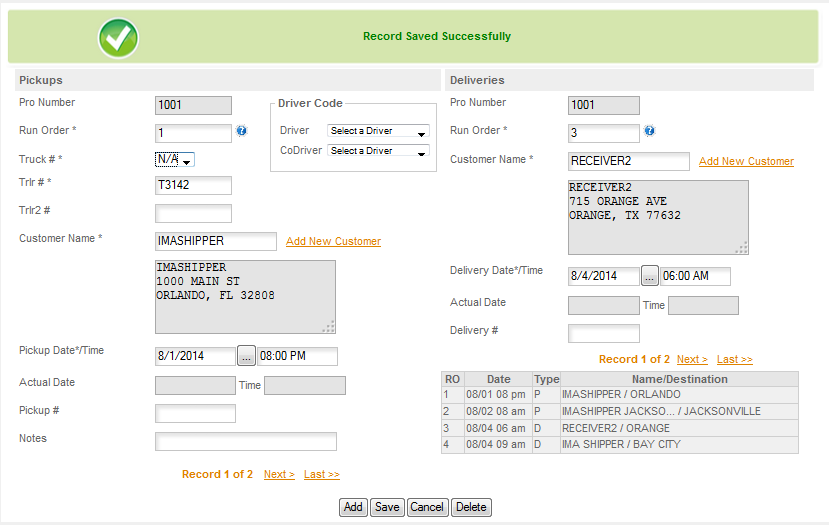
We now have 2 pickups and 2 deliveries. Notice the TYPE box which will tell you whether a stop is a Pickup or a Delivery. The red is also gone telling us that everything is in the right order and the dates/times agree. We do not at this time have a time/distance check in place so that is not being checked as entries are made. It is on the list - but it's a long list so it may be awhile before it shows up.
The same principal outlined here is used no matter how many stops you have. Once you have created the load the Run Order for the additional stops can be set as the load is entered. The program will always automatically add the NEXT run order when you add a stop, so adding your stops in the order they will occur is the easiest method to use. The run order can be edited as necessary anytime after the load is initially created. The load is created when the first stop & associated deliver are entered and saved.
Be sure to watch the tutor for this section as well as referring to the manual. HELP/LOADS/PICKUP & DELIVERY/ADDING STOPS.