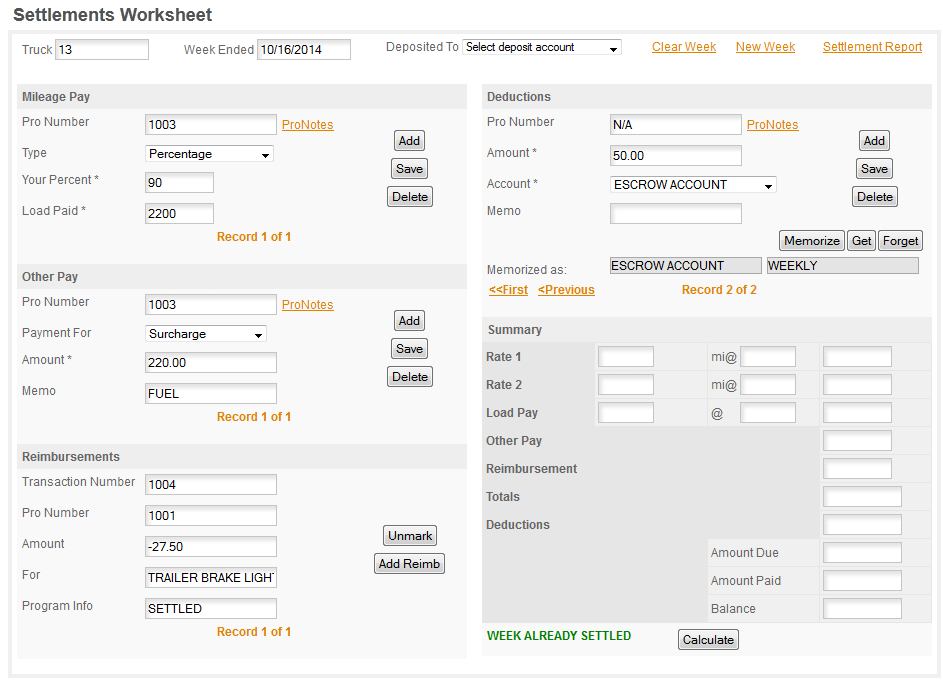
The Settlements page is designed to help you reconcile your settlements and then transfer them to the Income & Expense section in an orderly manner so you have traceable records of your trips, expenses & income. In the event of an IRS audit this will greatly simplify passing the audit with flying colors. The manual will cover the basic for the settlement sheet but be sure to also watch the tutors HELP/ACCOUNTING/SETTLEMENTS where there is a detailed walk through on each section of the page. To use the Settlements Worksheet you simply take your settlement and enter your pay, deductions & reimbursed expenses in the appropriate sections. When you're finished click CALCULATE, enter the net amount of your check in the popup that appears and if it balances export it. If it doesn't balance you will need to find the error and correct it before you can export it to the accounting section.
Below we'll go over each of the sections of the Settlement Worksheet -
MILEAGE PAY: This is where you primary pay will be entered. It will handle mileage, single & double rates, percentage and also has an Other category to handle things like Salary. You'll enter your PRIMARY payment method here, which for most drivers & owner/operators will be either mileage or percentage.
Pro Number: This will be load tracking number for the load you are entering payment for.
Type: This will be Mileage Single Rate, Mileage Split Rate, Percentage or Other. Select the one that matches the way you are paid.
The next two labels will depend on the Type you selected.
Mileage Single Rate: two boxes as shown in the illustration above.
Rate/Mile: the rate you are paid per mile.
Pay Mile: the number of miles shown on your settlement.
Mileage Split Rate: four boxes, 2 for each category.
Rate/Mile: with two boxes one for each of the two rates.
Pay Mile: with two boxes, one for each pay rate.
Percentage: two boxes as shown in the illustration above.
Your Percent: enter your percentage here.
Load Paid: enter the amount the load paid.
Other: one box to enter the Other pay amount.
Amount: the amount you were paid. This is only for use with your Primary Pay Method, Surcharges, etc. are in the next section.
Once you have the first record entered click SAVE to save it. If you have more than one trip for the week click ADD to add the next trip.
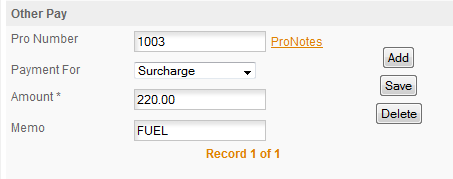
OTHER PAY: This is where you'll enter load/unloading pay, stop pay, safety, bonus, detention, fuel surcharges & other payments which are not listed in the drop down.
Pro Number: This will be load tracking number for the load you are entering payment for.
Payment For: Pick an option from the Drop Down or select OTHER and the program will give you a Description box to enter what the Other is.
Amount: Enter the amount you were paid.
Memo: If you select OTHER the description you enter will go in the Memo field. If you select another type from the drop down you can enter any memo you want here.
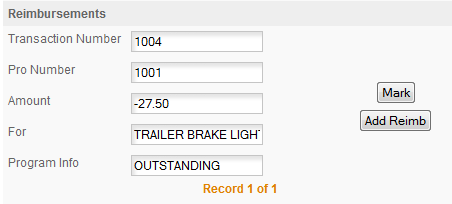
REIMBURSEMENTS: Any outstanding reimbursements that you have entered in the Trip Sheet or Income & Expense section if you are not using the Trip Sheet will automatically be imported to the Settlement page when you start a new week. If you load a previous week any that were Settled in that week will be loaded.
If you have a reimbursed expense on your settlement, locate it using the data toggle and click the MARK button. That will mark it as SETTLED and will also mark the related Income & Expense entry as SETTLED with the date of your settlement.
Note: if you exit the page before you export the settlement the Reimbursed Expenses will be reset to Outstanding so wait until you are finished and ready to Calculate and Export the settlement before you mark the Reimbursements as settled.
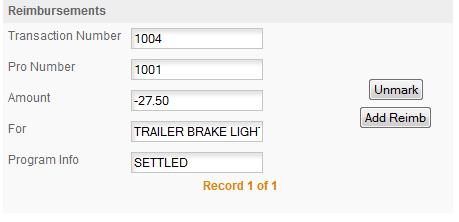
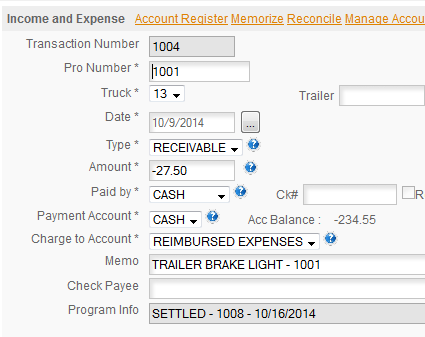
Here's the above record after it's been marked at settled -
and the related record in Income & Expenses -
The number on the SETTLED - 1008 - 10/16/2014 is the number of the transaction that settled this Reimbursed Expense and the date of the settlement.
DEDUCTIONS: This is where you will enter any deductions that are taken on your settlement.
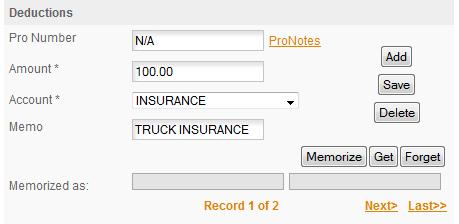
For our example the driver has a deduction for $100 which was for Truck Insurance. In our example we used the INSURANCE account that is already in the program, but you can click the ADD NEW option in the Drop Down and add a new account if you are entering something and there isn't a default account that you want to use.
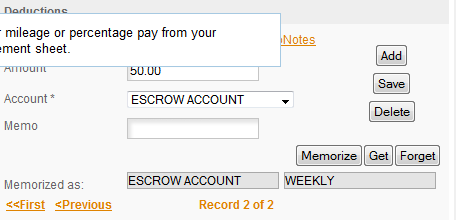
You can also MEMORIZE a transaction if it is something that will be going on long term. This will simplify entering it in the future, just click GET and select the transaction from a list of Memorized Transactions and the program will make the entry for you. You start by making the initial transaction -
Once you have the initial transaction entered and saved click the MEMORIZE button and the program will ask you a couple of questions about this transaction -
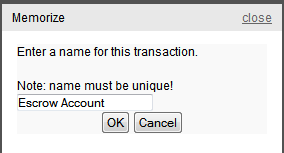
First you'll tell the program whether this transaction is Weekly or Monthly. Yes for Monthly, occurs once a month or No for Weekly, occurs every payroll. Next the program will ask you for a name for this Memorized Transaction -
Enter whatever name you want to use to identify this transaction. Each Memorize Transaction must have a unique name. The program will then add this transaction to the Memorized Transaction List -
and will indicate that the transaction is memorized as with the name and the recurrence period.
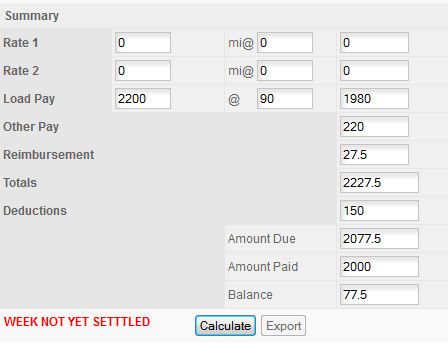
CALCULATE & EXPORT: Once you have all the information from your settlement entered you're ready to check the accuracy of your data and then export it. Click CALCULATE to check the settlement and the program will ask you for the NET AMOUNT of you check. This is the amount that the actual check is for -
You'll notice on this example that the amount is incorrect which is indicated by the BALANCE not being zero and the EXPORT button still being disabled. If this occurs check to be sure you entered the right amount, if you didn't correct it, if you did then you will need to go over your entries and find the mistake. Once you have it corrected click CALCULATE again until you get it to balance -
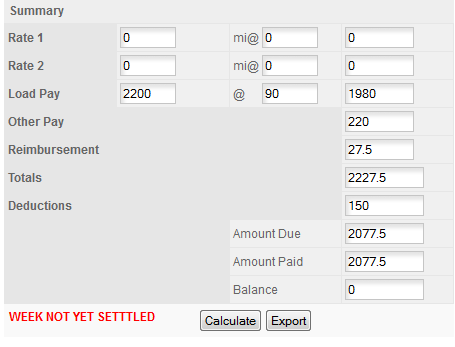
When it balances the Balance will be zero and the EXPORT button will appear. DO NOT JUST ENTER THE NUMBER IN THE AMOUNT DUE box. The program is going to enter the amount you enter as a Deposit in your Checking or other selected account. Always take the time you need to find any errors and get the settlement to balance before you export it. Taking the short cut may save you 5 minutes today, but it could cost you hours if you find yourself in an IRS audit.
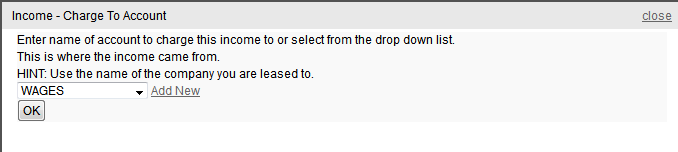
When you click EXPORT the program will ask you for the name of the Charge To Account to charge this income to. For our example we've simply used the WAGES account that comes with the program but we recommend that you open an Income account with the Company Name for the company the payment comes from. If you do work for different companies during the year this will greatly simplify reconciling your books to your W2's or 1099's.
When you click OK the program will export all the data you entered to your Income & Expense section -
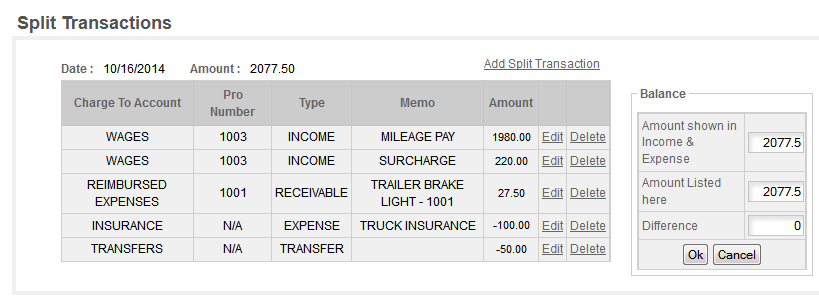
as a SPLIT transaction. The Split will then detail exactly what each item from the settlement was -
This will allow you to track all your trips, expenses and deductions in detail.
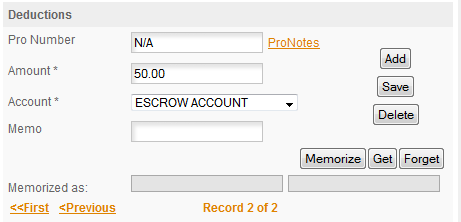
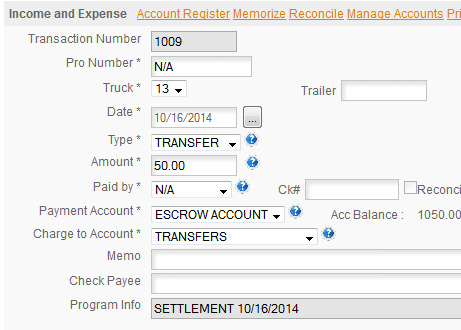
ESCROW ACCOUNTS: We also had an escrow deduction on this settlement. If your company keeps an escrow account for you you'll need to set up an Escrow savings account to keep that money in. The program will then automatically deposit any escrow deductions from your settlement to this savings account for you to help you keep track of your settlements. For details on Escrow accounts, in your program click HELP/FAQ'S and then on the forum click the FAQ's One Truck & General forum and look for the post on Escrow Accounts. While you're there take a look around, there is a lot of helpful information available on the forums and you can post your own questions there is you'd like. Below is the entry in Income & Expense transferring your $50 deduction to the Escrow Account which we set up for this purpose. You can name the account anything you want as long as the name starts with ESCROW. You must use this name for the special escrow functionality to work.
Remember - HELP/ACCOUNTING/SETTLEMENTS for a walk through on each section of this form.