New Trip
Miles are organized by the trip and are entered for each state you travel in on the trip. A trip is defined, as it is in other sections of the program as a billing or a load. For LTL - SubPro type loads the trip is usually defined as all the portions of that trip. An easy way to define a trip in general is a trip is from the last place got empty to the next pickup and then to the delivery or deliveries for that load. So a trip runs from EMPTY to LOADED to EMPTY again. The empty miles from the last Delivery to the next Pickup are generally associated with the Pro Number for the trip you are picking up.
We identify the trips by the Pro Number for the trip, and for LTL - SubPro loads by the numeric part of the Pro Number. So when the program exports a SubPro type of trip it will export all the miles for all the portions under the last SubPro used. For example, if you had a SubPro 1000A, 1000B, 1000C, then all the miles would be exported under 1000C. For a Split Load the two portions of the load are usually tracked separately, so 1000P and 1000D would each be exported individually.
NEW TRIP is used to start a new trip for the currently displayed Truck. Each time your STATUS changes you will start a New Trip.
ADD is used to add another mileage to the currently displayed Trip. Each time you exit the state you've been traveling in or arrive at a destination (trip stop) you will click ADD to add the miles for that state.
When you go to the mileage page you will be prompted for the truck to load. To change trucks click on LOADS/MILEAGE on the menu bar and then select the new truck from the drop down list.
FIRST TIME - if you have not previously entered mileages for a truck you will get the NO TRIPS window.
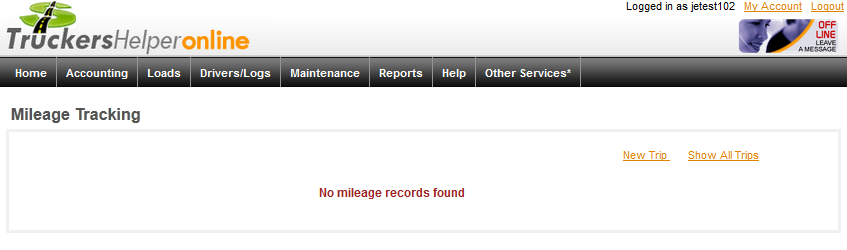
Click on NEW TRIP to enter your first trip for the truck.
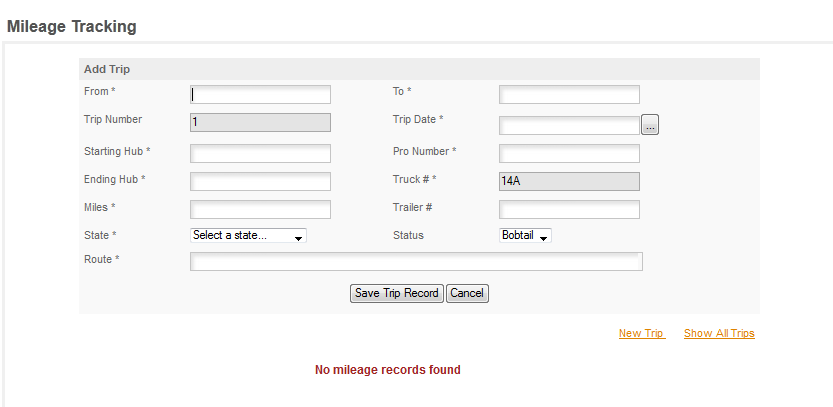
The first time you enter mileages the program will ask you for a starting location and a starting hub (odometer). This will be where the truck was when you started tracking mileages for it and the odometer reading at that time. This is only done once. After that the starting location will always by the previous TO location and the last ENDING HUB will always be the next STARTING HUB.
Enter the initial FROM location. This is the location that the truck is at when you start tracking the mileages for the truck.
Enter the TO location. This is where the truck will have it's next status change. For example. if you are starting your tracking from your yard or office location and the truck will be going from there to it's first pickup you would enter the Pickup location as the TO location.
Note: in Truckers Helper you'll enter a new TO location every time your status changes. For multi-stop loads you can enter either each stop or you can just enter the final destination.
For the trip date you can use either the date the trip starts or the date it will end. Generally the date the trip started is used. Format for dates a MM/DD/YYYY and you can leave out the year if the trip is in the current year and the program will fill it in automatically.
ONE TRUCK NOTE: If you want to print out a trip sheet report it's best to use the date the trip ends as this will put the date in the week the trip report is for.
Enter the Pro Number (this is the number the program will use to track this load throughout the program).
The truck number will be brought in when the page loads.
Enter the trailer number.
Select the status from the drop down or enter the first letter - Bobtail, Empty or Loaded.
Since this is our first entry for the truck we'll also need to enter the starting odometer. This is the odometer reading at the starting location. In the future the last ENDING hub will always be the STARTING hub for the next trip.
Note: HUB as used in Truckers Helper is the same as your ODOMETER reading.
You can either enter the Ending Hub (odometer reading) or the miles you traveled in the current state. The program will calculate the other field for you.
Select the state from the drop down list.
Note: For a New Trip this will ALWAYS be the same state you just ended the previous trip in. The program maintains a non-stop record of From - To locations and of Starting - Ending hub readings.
Enter the route you traveled. Generally the major highways or local for local in city miles are all that's required.
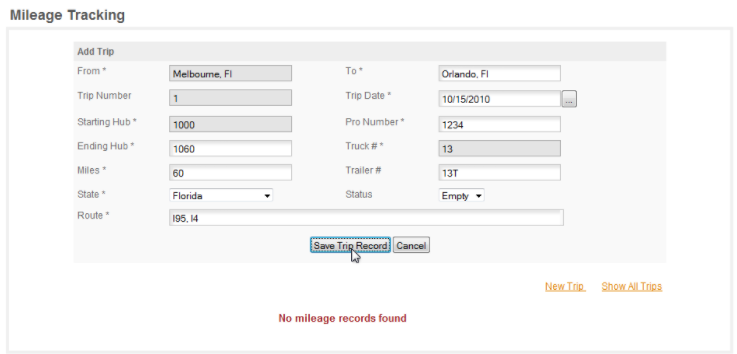
Here's a completed example of the NEW TRIP page - for our sample trip - MELBOURNE, FL to ORLANDO, FL, empty.
Please WATCH THE TUTOR - HELP/LOADS/MILEAGE/NEW TRIP for a walk through of this process.
To add more miles to this trip you would click on Add next. If your status changes, for example when you pickup the status changes from E or L so you would start a NEW TRIP at that point.